![]()


(Click on pictures to view at full resolution on Flickr.)
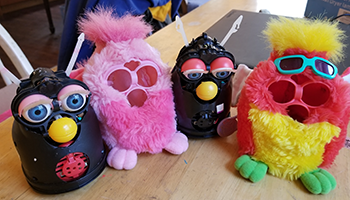
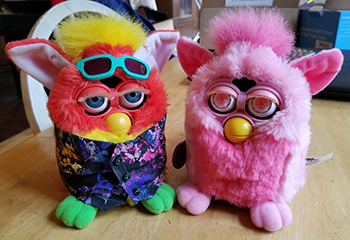
I was recently lucky enough to come across two of my dream Furbys in the same eBay listing! I've been meaning to write a tutorial on washing Furbys for a while now, and these two gave me the perfect opportunity to do just that. |
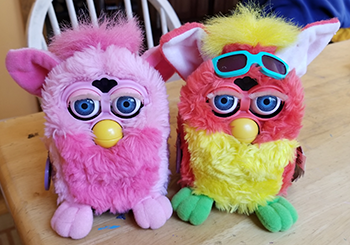
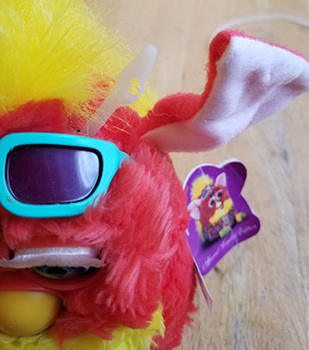
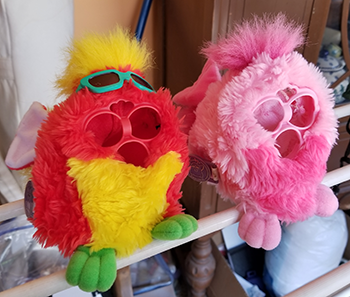
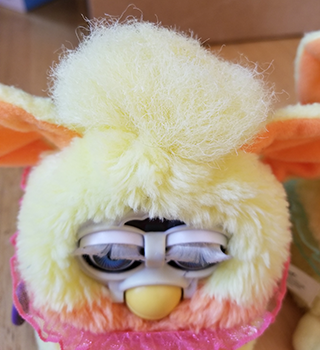
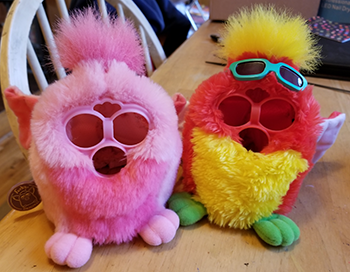
Meet Pink Melonade and Sea Salt! Sea Salt had unfortunately lost his shirt and sandals, and both of them had matted fur with a bit of a smell. Nothing a good bath can't fix! |
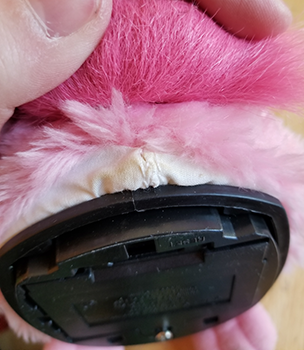
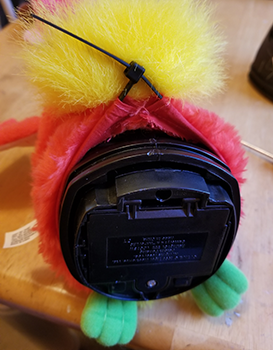
Start by flipping your Furby over. There's a thin fabric sleeve running along the bottom of the fur, held closed with a few large stitches. Slice through these stitches with a craft knife or seam ripper. |
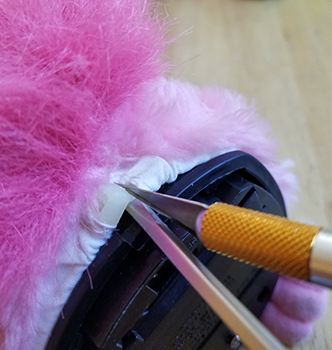
Pull apart the two sides of the sleeve to expose the zip tie holding the fur in place. There's no really easy way to remove it- what I do is wedge a flat head screwdriver underneath, and slowly saw through with my craft knife. If that doesn't work I'll just work a pair of scissors around it and cut through, although that poses a risk of accidentally cutting through the fur itself. Whatever you do to get through it, remove the old zip tie from the sleeve and discard. |
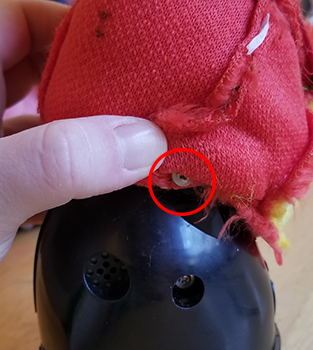
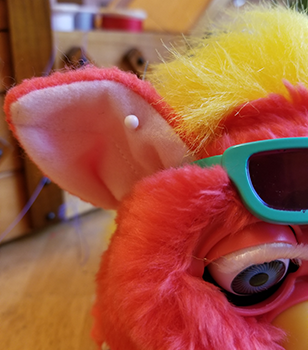
Next, we need to remove the ears. They're each held on with a stitch to the "ear bones", or the pieces of plastic driven by motors that ultimately allow them to move. |
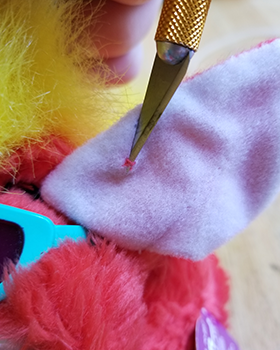
Slice through these stitches with your craft knife or a seam ripper and discard the loose thread. |
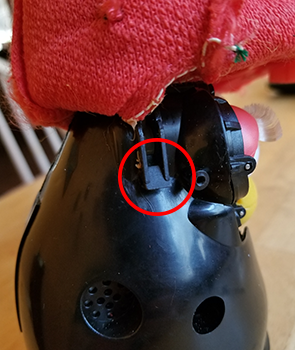
Once the stitches are removed, you can slip the ears off the ear bones. There's three main styles of ear bones that I've come across- the ones on Sea Salt are what I call "the hook" style. |
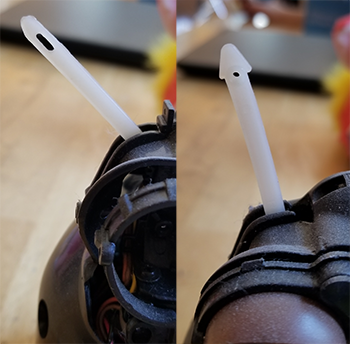
Luckily, I had two other naked Furbys on hand that show off the other two ear bone styles! |
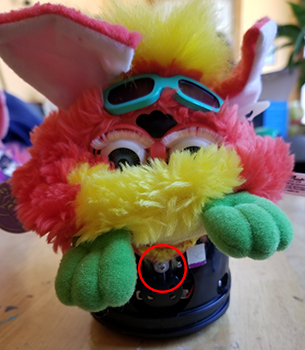
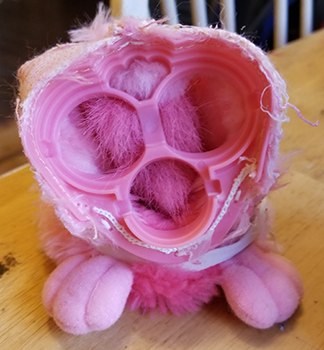
After removing the zip tie and ear stitches, it's time to release the faceplate (the piece of plastic surrounding the IR sensor, eyes, and mouth) from the main body. Like the ear bones, there are three main styles of faceplates that I've seen. The best kind (in my opinion) simply clips into the main body and can be removed by gently pulling outwards, but I've only ever seen them on Furbys from the first two series, produced in 1998 and early 1999. Sea Salt here has the next-best kind, which is held in place with screws. Remove this bottom screw, and continue to pull the fur upwards, turning it inside-out at you go. |
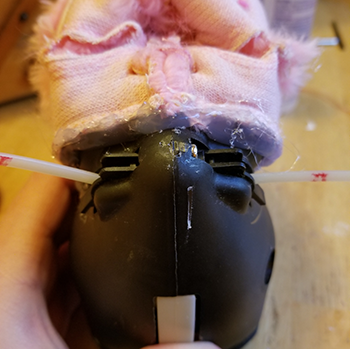
Pull up the fur at the "temples" to reveal the two side screws. After these are out, the fur can be pulled completely off the body. |
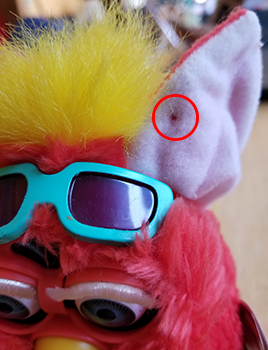
Unfortunately, Pink Melonade came with my least favorite type of faceplate- the kind that's attached with hot glue. I tried to highlight it in the photo, but it's hard to really capture on camera. The glue is so old and dry by now that the faceplate can usually be pulled straight off, although you might have to spend some time picking globs of glue off the fur and body. If it's stubborn, turn the fur inside-out while it's still on the body and work in sections to remove the old glue. |
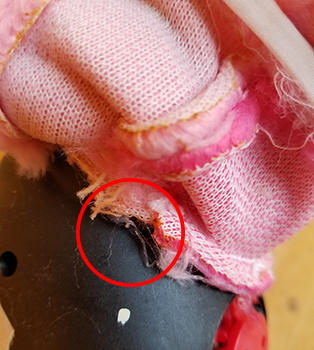
Even after you've freed the faceplate from the body, the fur may not want to come off. Some Furbys have these pieces of plastic underneath the ear bones that hook onto the fur. If you're pulling upward and the fur isn't moving, pull downwards around this area first. |
Fur removed and ready to be washed! A lot of customization work is also made much easier with the fur off. |
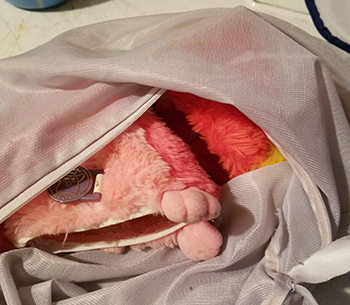
If using a washing machine, put the fur inside a delicates bag. Use unscented laundry detergent and avoid fabric softener completely. |
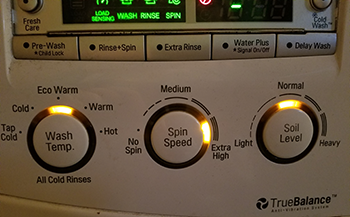
Use the maximum spin speed (if possible) to remove as much water as possible and reduce drying time. In my experience, water temperature doesn't make much of a difference. It's also possible to wash the fur by hand- just make sure to rinse really well to avoid leaving soap residue behind. |
After washing, set the fur out to air-dry. Never put Furby fur in the dryer, even on the lowest heat setting. My twin Sunny Yellow babies are a perfect demonstration of why. |
Here's Buttercreme's fur. Note how fine the plastic fibers making up the tuft are. |
And, here's Jelly Fruit. After only about 10 minutes in the dryer on the lowest setting, the plastic melted and turned the head and tail tufts into solid lumps of misshapen fibers. I actually don't mind it here, as it helps make two otherwise identical Furbys distinct from one another. Still, I'm willing to bet that most people would want to avoid this! |
After the fur has completely dried, which can take as little as a couple hours on a warm, breezy day and as much as a couple days, use a metal brush to tame it. I use one designed for dogs and cats that I found at a local dollar store. You don't want to use a plastic brush designed for humans, as it will cause static to build up in the acrylic fur. In the picture, you can see the difference that a good brushing makes- Pink Melonade's fur on the left has been brushed, while Sea Salt's on the right has not. |
Now that the fur has been thoroughly washed and brushed, it's time to make your Furby whole once more! Start by reattaching the faceplate- I find that turning the fur inside out makes this much easier. If it's the "screw" type, like Sea Salt's, simply replace the screws. The "clip" type is even easier- just align with the body and press into place. Unfortunately, the "hot glue" type requires a bit of extra work. |

I find that it's easiest to glue in two parts- first along the top, and then the bottom. Firmly press the faceplate into place with one hand, and glue with the other. Once the glue is applied, switch to pressing the faceplate with both hands until it's completely cooled. Be sure everything's properly aligned before you start, as brand-new hot glue is much harder to remove than the stuff from 20 years ago. |
I'm normally against big, thick layers of hot glue, but it's necessary in this case to fill in all the gaps and make sure the faceplate is nice and secure. |
Almost done! Now, thread a new zip tie through the sleeve. I've also heard of people using a piece of elastic instead, to make the fur easier to remove for future grooming. |

Tighten the zip tie slowly, aligning it with the groove running around the base. Cut off the excess. If you'd like, you can pull the sleeve completely closed and redo the stitches to completely hide your work, but I don't bother because it's hidden at the back anyway. |
Final step- re-sewing the ears! I find that threading pins through those holes in the ear bones makes this much easier. If you'd like to skip this step entirely, I've also seen people use earrings to hold the ears in place and add a bit of flair. |
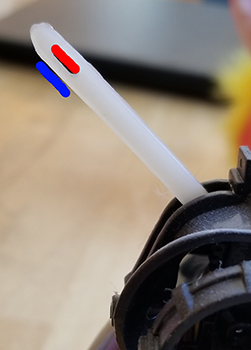
With the ears in place, pass the needle through the hole in the ear bone (marked in red) from the back, then go back through the area directly below it (marked in blue). Give the ear a gentle tug to make sure it's secure. I ususally use three or four stitches just to make extra sure. |
Create one final stitch on the back of the ear to secure the thread, tie off the ends and cut off the excess, and you're done! |
All clean and neat! But, where did Sea Salt get that handsome shirt? And what about Pink Melonade's fancy new eyes? To find out, you'll have to check out my tutorials on making Furby shirts (coming soon!) and creating custom eyes and eyelashes! |
All text and images © My Furby World, 2019.